
A free, production-ready astro.js template powered by Tailwind CSS and TypeScript, specifically designed for Shopify. Utilizes the Shopify Storefront API through GraphQL and provides everything you need to jumpstart your Astro project and save valuable time.
Made with ♥ by Zeon Studio
If you find this project useful, please give it a ⭐ to show your support.


- 🌐 Dynamic Products from Shopify Storefront API
- 💸 Checkout and Payments with Shopify
- 🌞 Automatic Light/Dark Mode
- 🚀 Fetching and Caching Paradigms
- 🔗 Server Actions for Mutations
- 🔐 User Authentication
- 🧩 Similar Products Suggestions
- 🔍 Search, Sort, Different Views Functionality
- 🏷️ Tags & Categories & Vendors & Price Range & Product Variants Functionality
- 🖼️ Single Product Image Zoom, Hover Effect, Slider
- 🛒 Cart & Easy editing options for cart items
- 📝 Product Description on Multiple Tabs
- 🔗 Netlify Setting Pre-configured
- 📞 Support Contact Form
- 📱 Fully Responsive
- 🔄 Dynamic Home Banner Slider
- 📝 Write and Update Content in Markdown / MDX
- ⌛ Infinite Product Load on Scrolling
- 🏠 Homepage
- 👤 About
- 📞 Contact
- 🛍️ Products
- 📦 Product Single
- 💡 Terms of services
- 📄 Privacy Policy
- 🔐 Login
- 🔑 Register
- 🚫 Custom 404
- shopify
- astro 5.16+
- node v22.20+
- npm v10.2+
- tailwind v4.1+
-
To get the tokens needed, create a Shopify partner account.
-
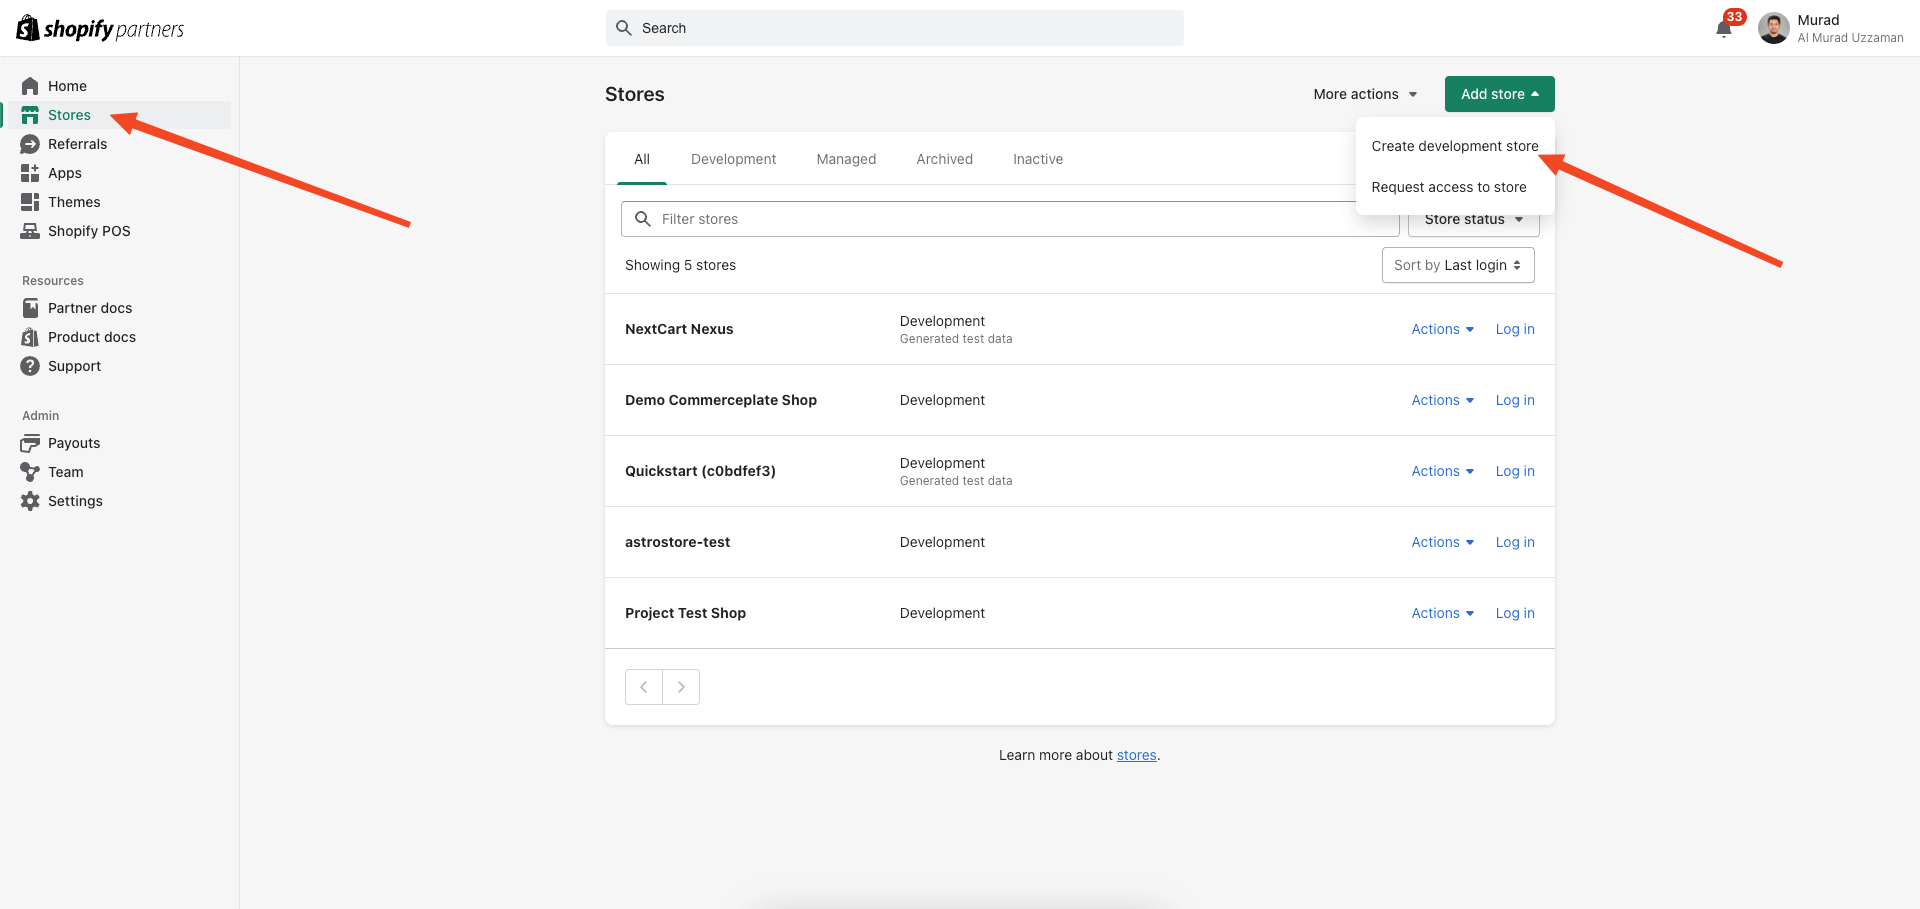
Now go to 'Stores' and select 'Add store.' Create a development store using the option 'Create development store'.
-
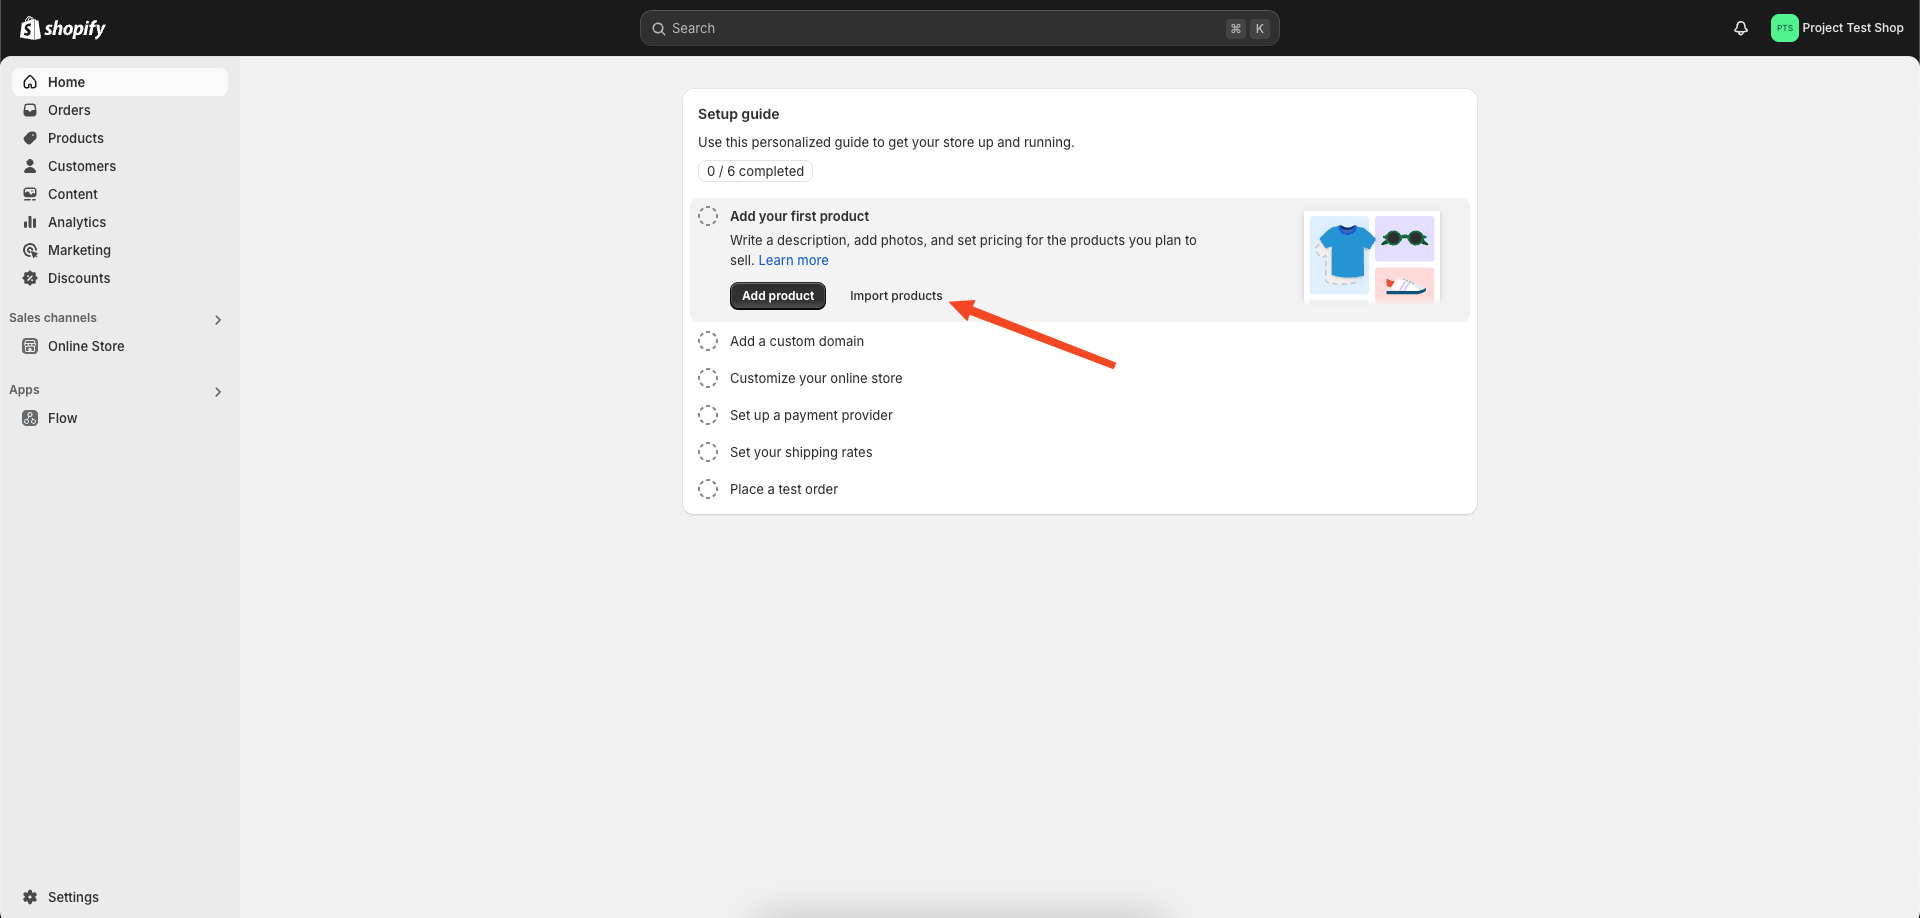
Click on import products.
-
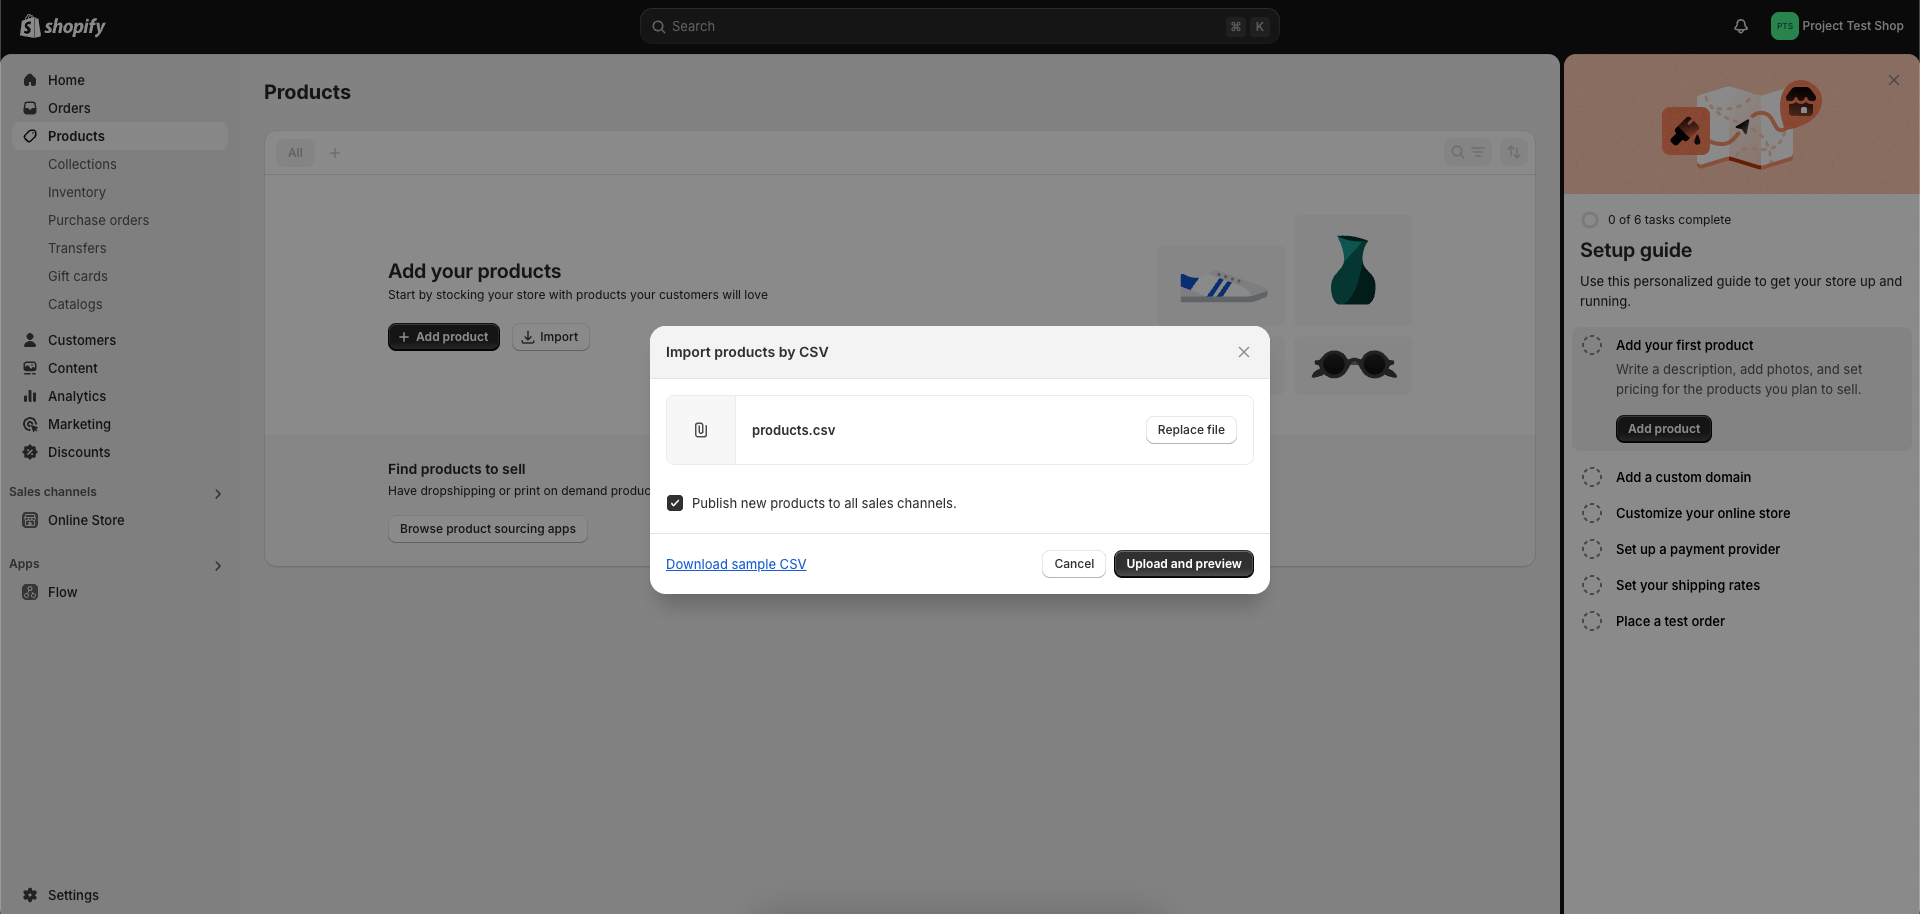
Locate the 'products' CSV file in the public folder of the repository and upload it for demo products.
-
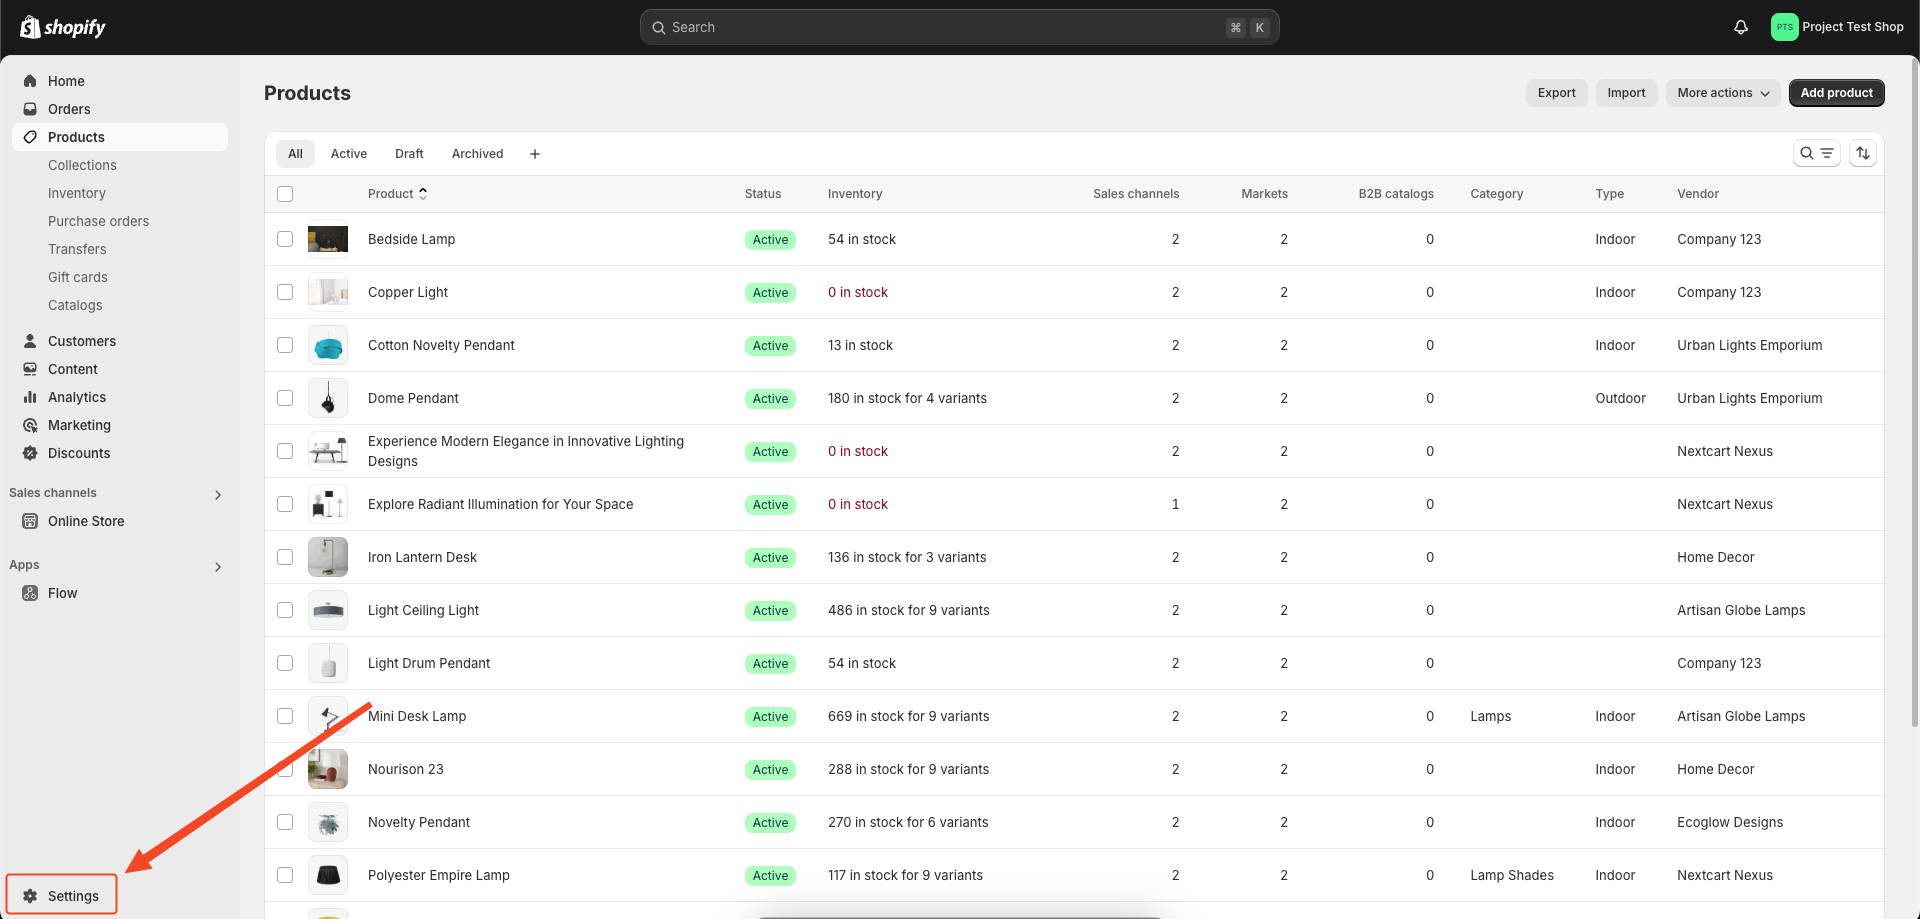
On the admin dashboard, click on ‘Settings’ at the bottom of the left sidebar.
-
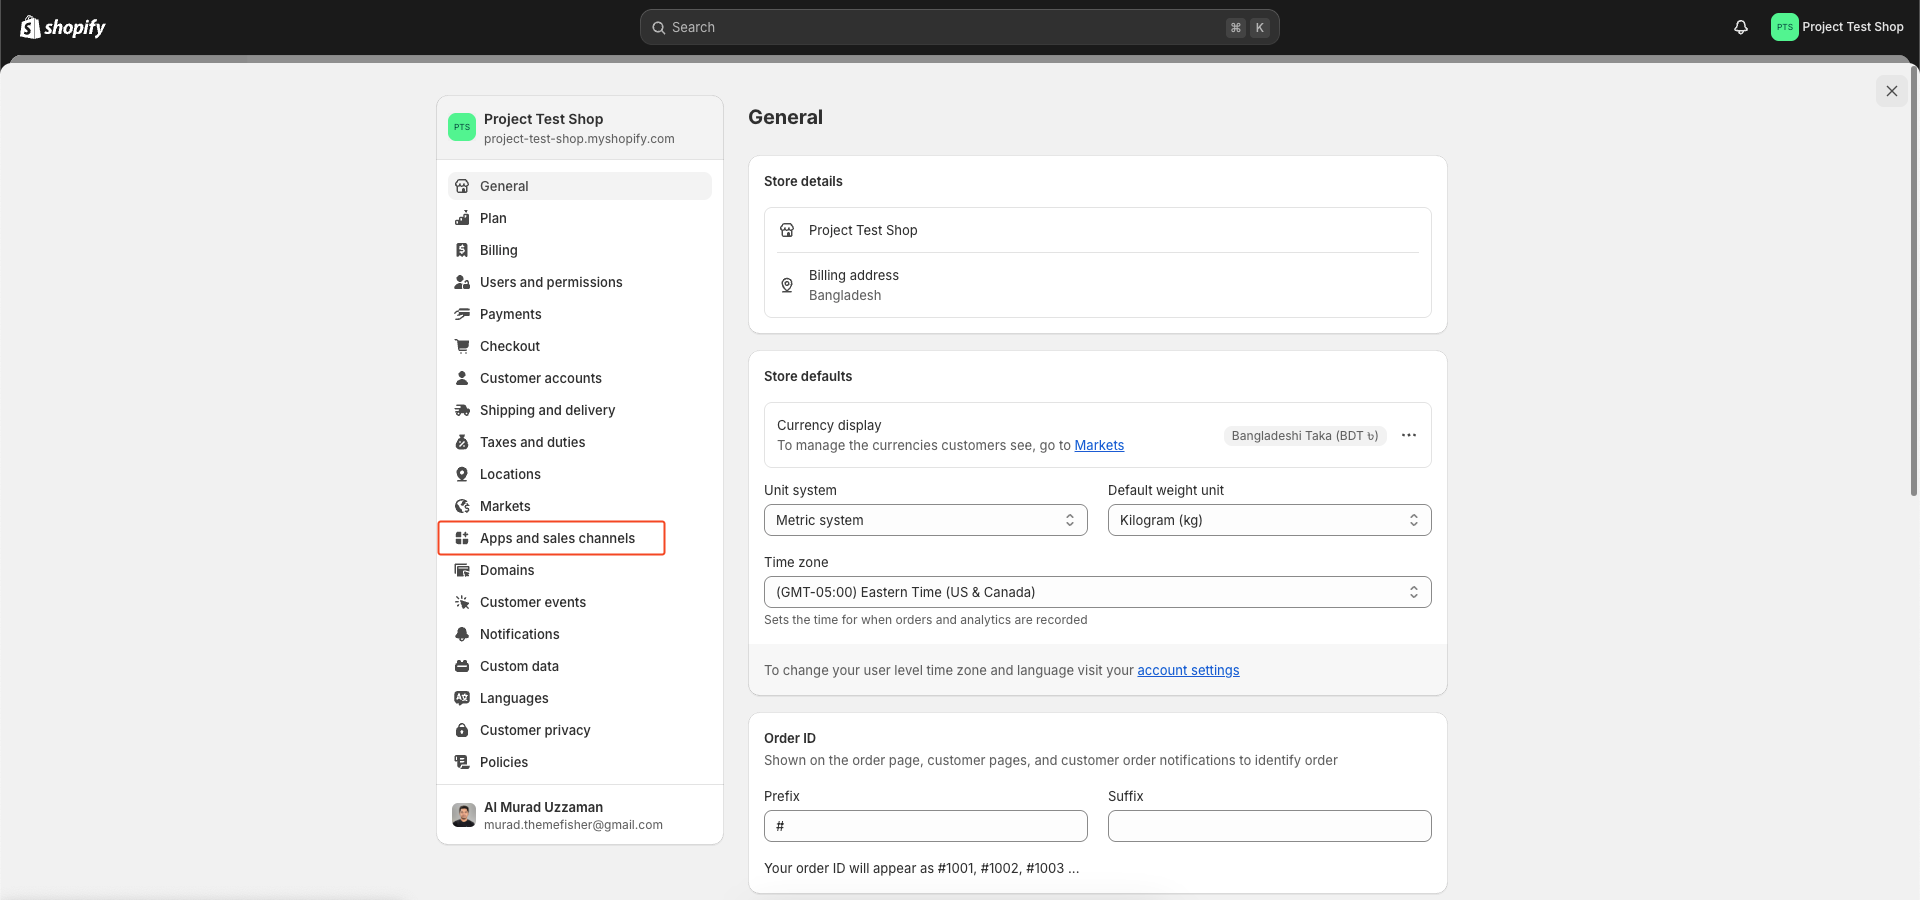
On the Settings page, click on ‘Apps and sales channels’ on the left sidebar.
-
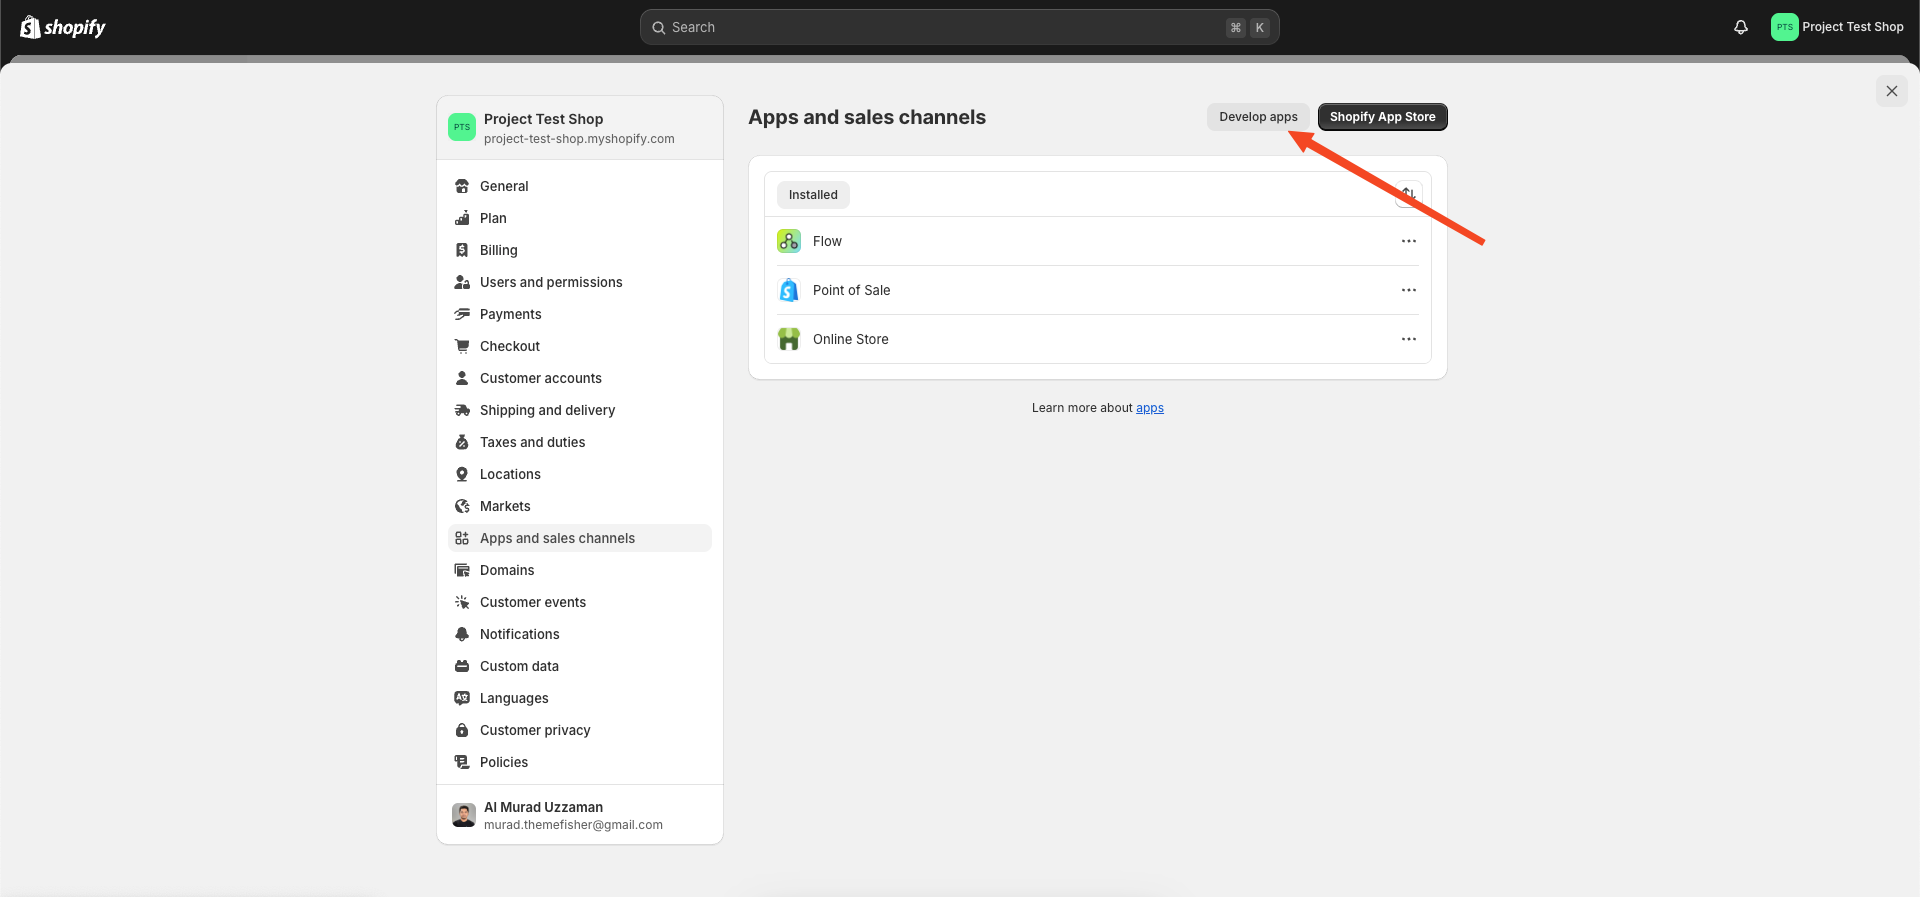
In the Apps and sales channels page that opens, click on ‘Develop apps’ on the top right.
-
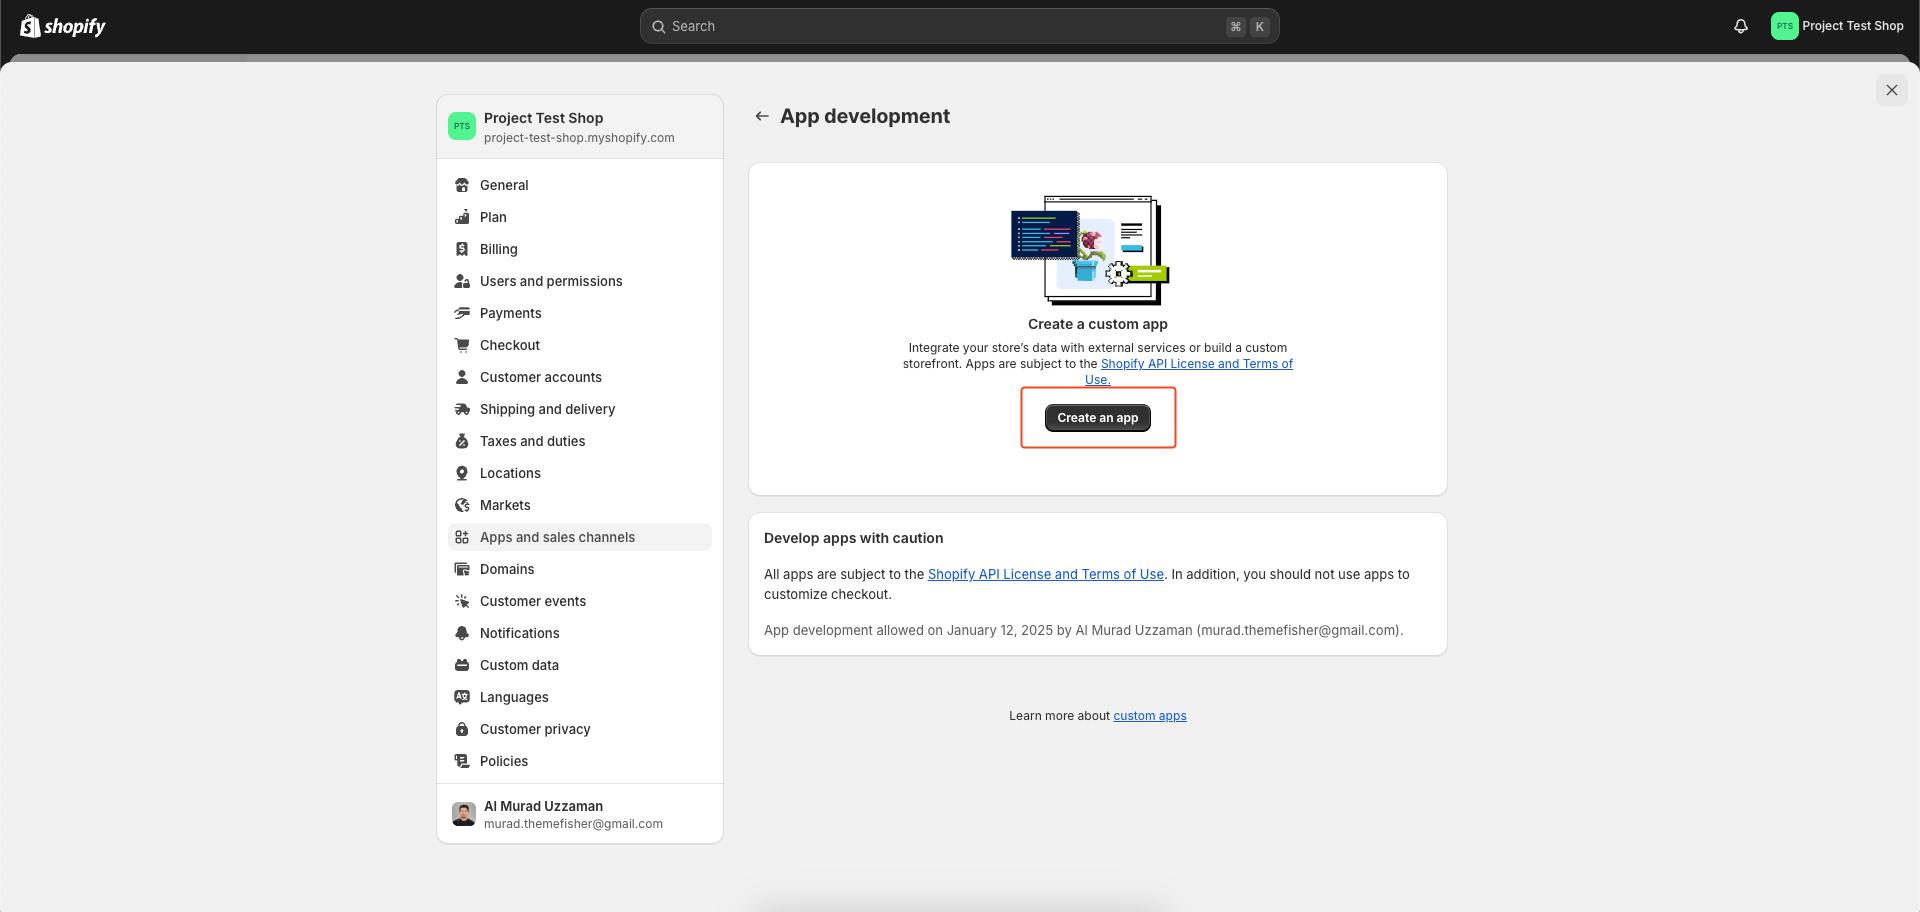
Now, on the App development page that opens, click on ‘Create an app’.
-
A ‘Create an app’ popup opens. Fill in any name in the ‘App Name’ text box. In the App Developer text box, your name and email id is automatically fetched. Else type in the same email id you used while signing up for the Shopify store.
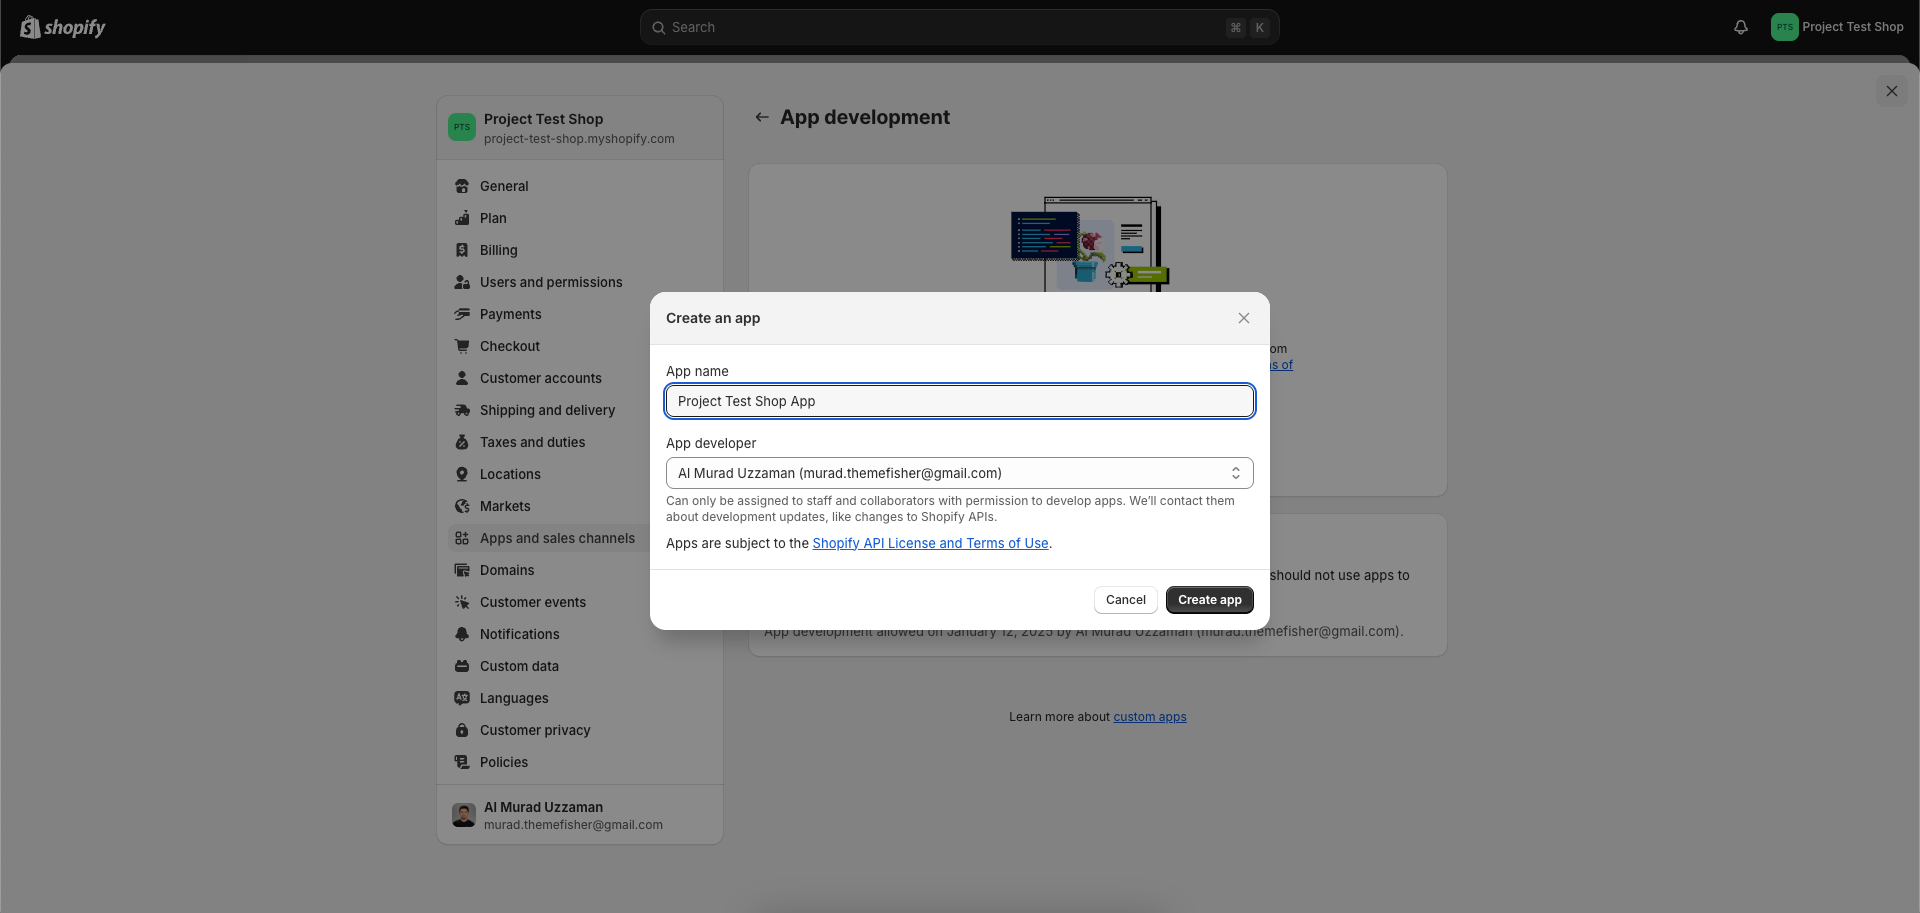
-
Next, click on ‘Configure’ in the Storefront API integration section.
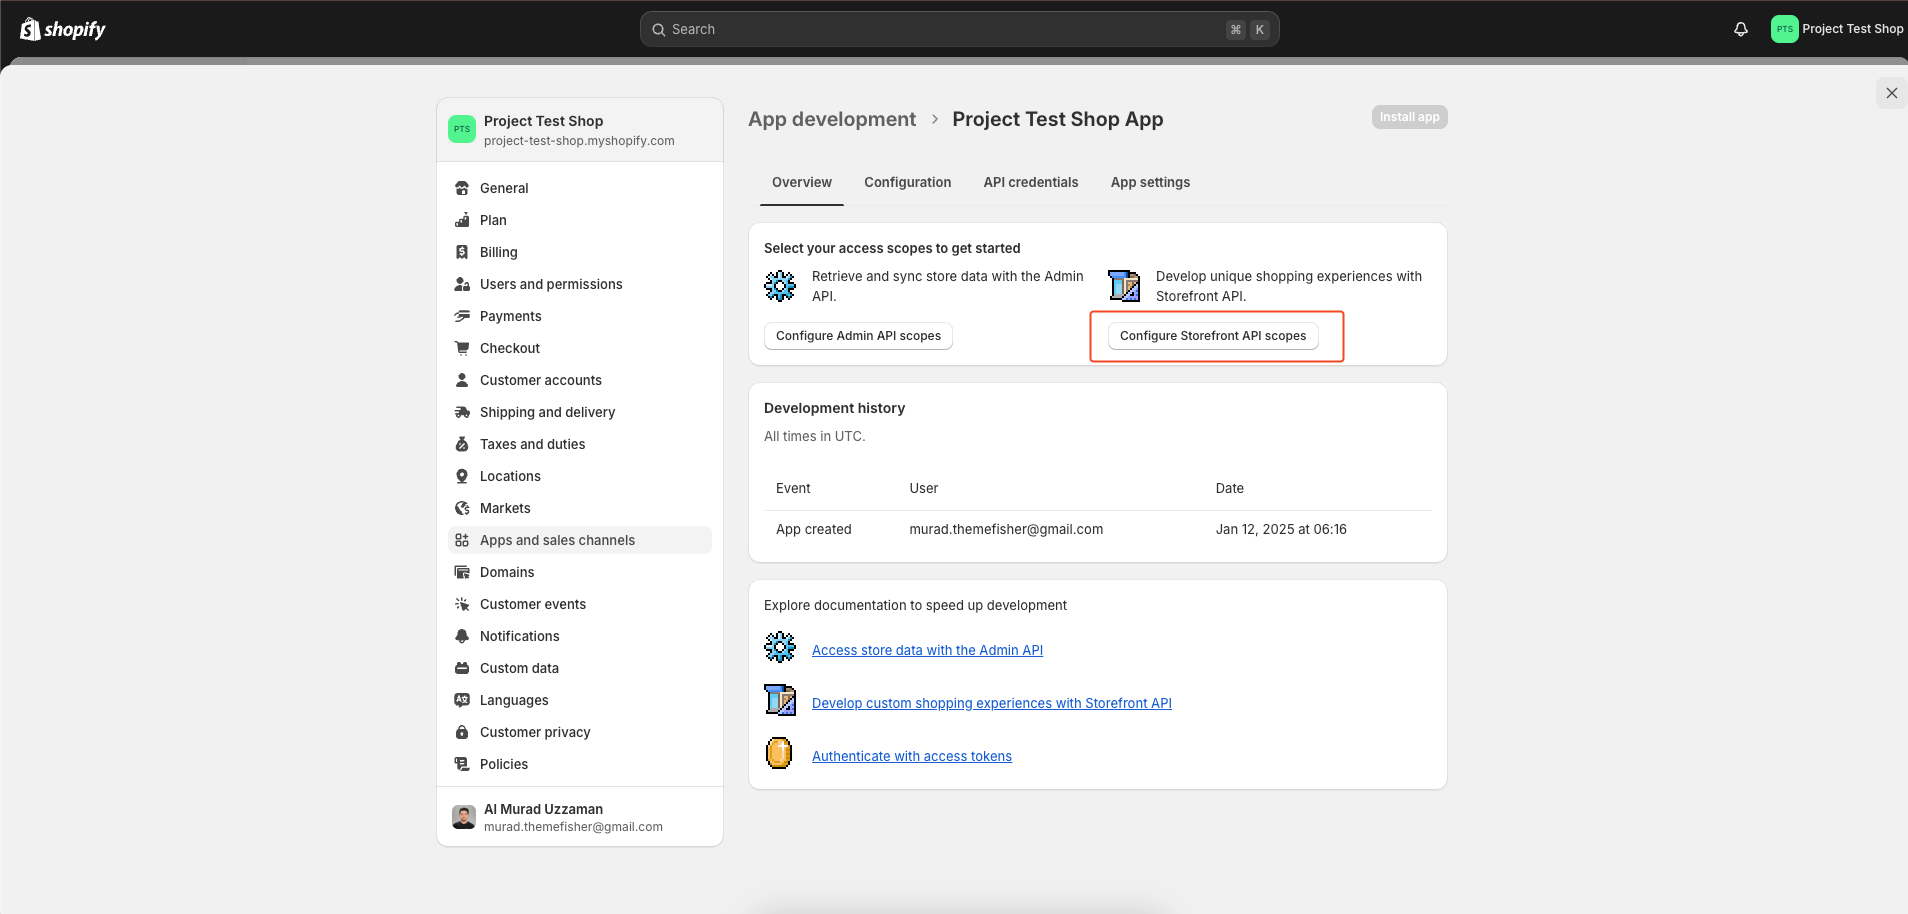
-
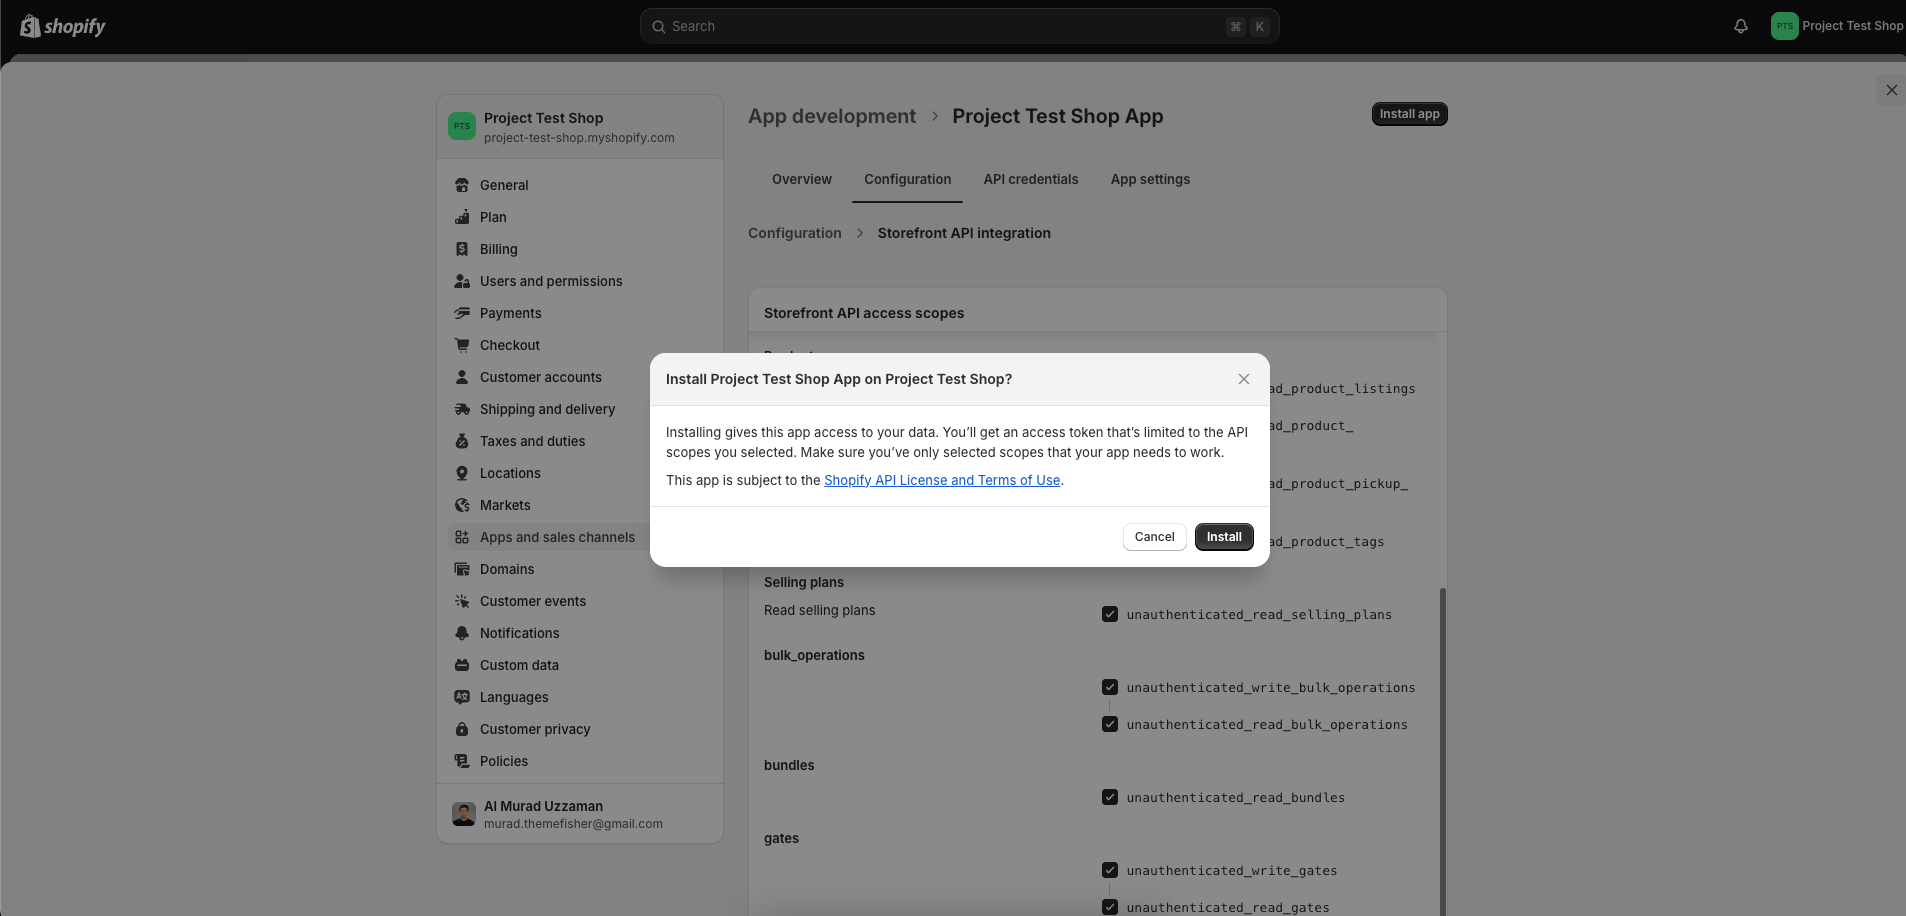
In the Storefront API access scopes, select and check all the boxes and click on ‘Save’ and then ‘Install app’.
-
Navigate to the 'API credentials' tab and locate three essential pieces of information. Subsequently, update your
.envfile by replacing the placeholder quotes("") in the.env.examplefile with your Shopify credentials.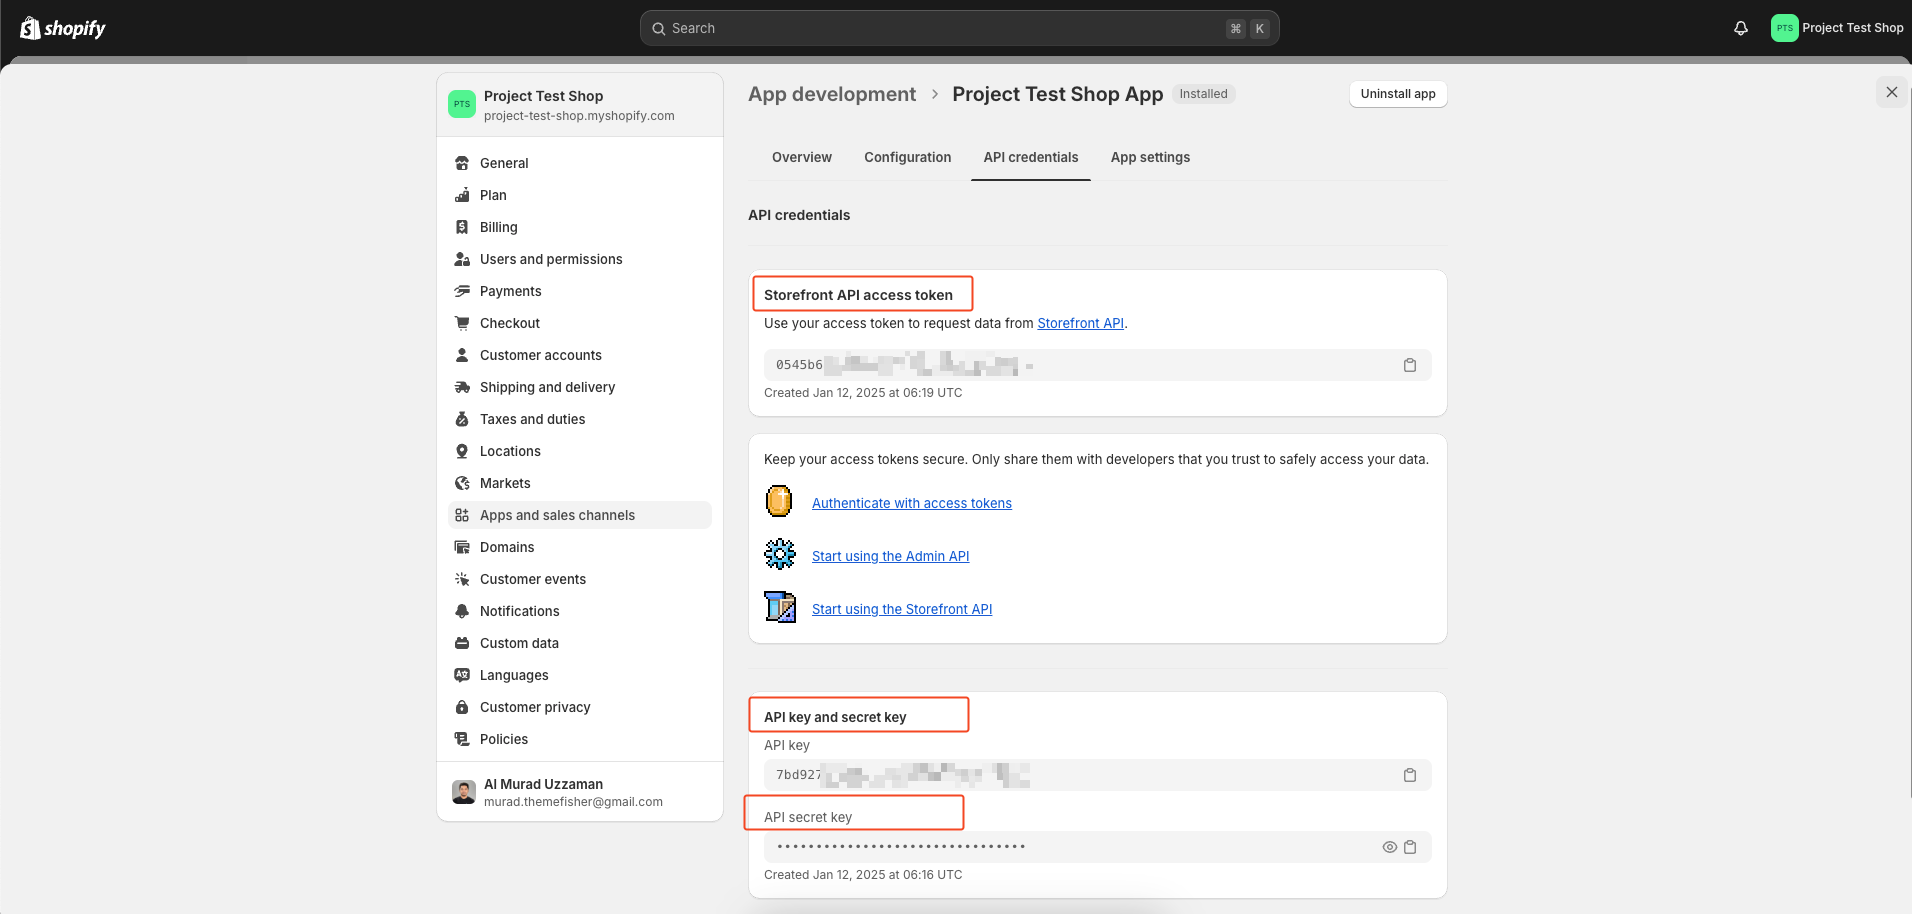
-
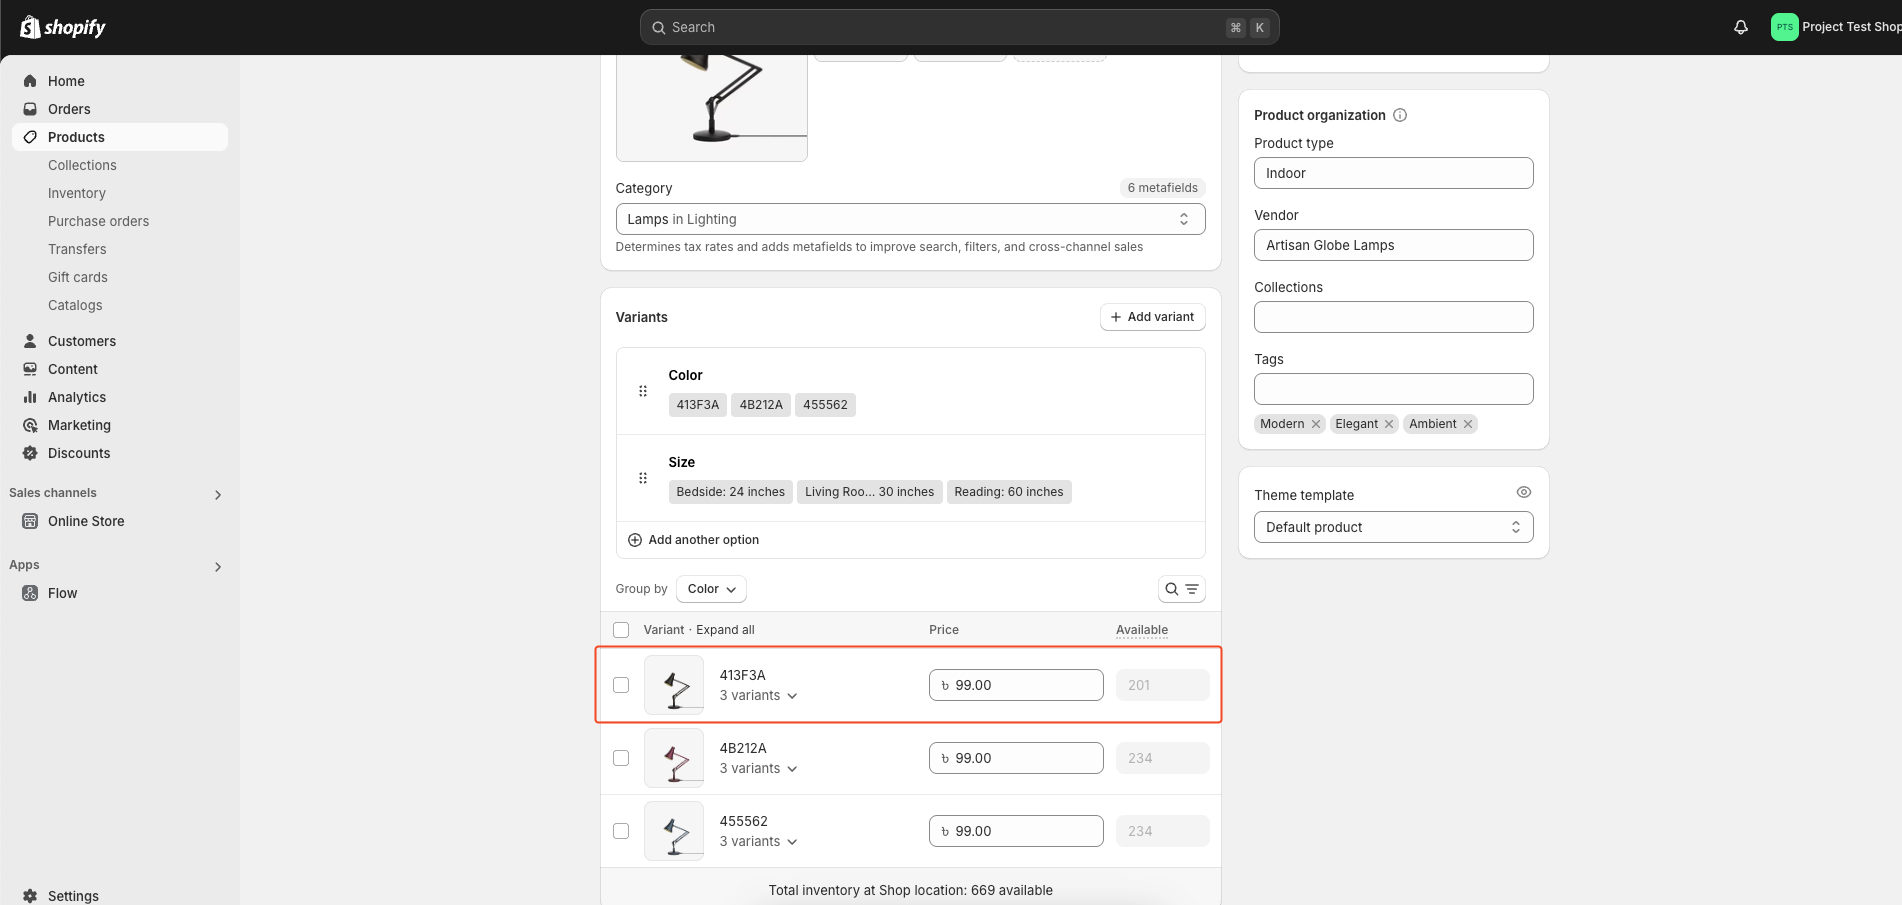
When adding your product, use the same alt title for images with the same color. This helps the first image appear as the color variant in the selector.

-
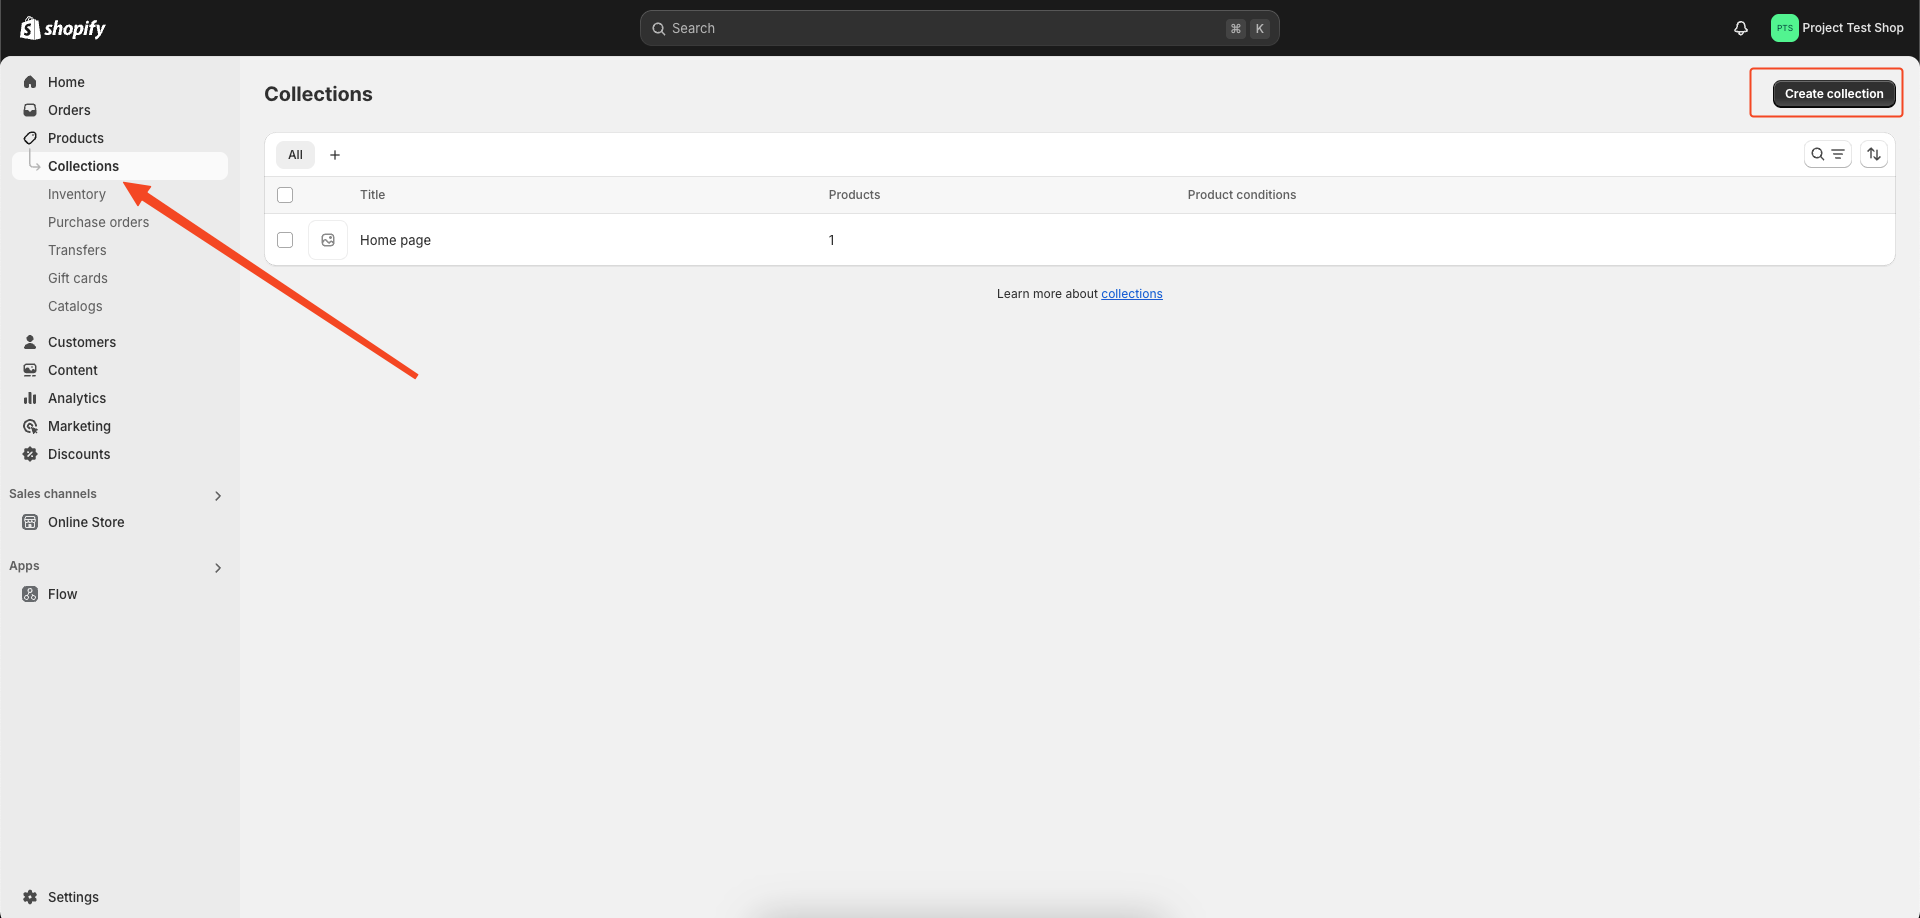
We have the option to create additional collections for products.
-
Go to the file
/src/config/config.jsonin your Shopify project and find the 'hero_slider' section. You’ll see something like this:"shopify": { "currencySymbol": "৳", "currencyCode": "BDT", "collections": { "hero_slider": "hidden-homepage-carousel", "featured_products": "featured-products" } } -
Change the 'hero_slider' collection name to something of your choice.
-
Then, go to your Shopify Partner Dashboard, navigate to Products > Collections, and create a collection with the same name you set in the config file (e.g., 'hidden-homepage-carousel').
-
Add the products you want to display in the hero slider to this collection.
npm install
npm run dev
npm run build
We use GitHub Issues as the official bug tracker for this Template. Please Search existing issues. It’s possible someone has already reported the same problem. If your problem or idea has not been addressed yet, feel free to open a new issue.
Copyright (c) 2024 - Present, Designed & Developed by Zeon Studio
Code License: Released under the MIT license.
Image license: The images are only for demonstration purposes. They have their license, we don't have permission to share those images.
If you need a custom theme, theme customization, or complete website development services from scratch you can Hire Us.